
Create a part
Create a reusable wire part with its identifier and configured fields, then check the saved details before preparing its production steps.
Before you start
You need access to Parts and permission to create parts. Have the part number, description and any required specifications ready. Search the part list for the number before adding a new record.
The example part C110-RD-0160 describes .0160-inch diameter C110 copper wire. Your company’s configured fields may differ.
Create the part
- Open Add Part
Select Parts in the top navigation, then Add Part, at the top right of Parts Catalog beside Import Records.
- Enter the identifier and description
Enter Part Number and Description. Use a description that identifies the material and finished size, such as “C110 copper wire, .0160 inch DIA.”
If Instructions is shown, enter the general instructions that belong with the part. Individual production-step instructions are entered with their respective steps.
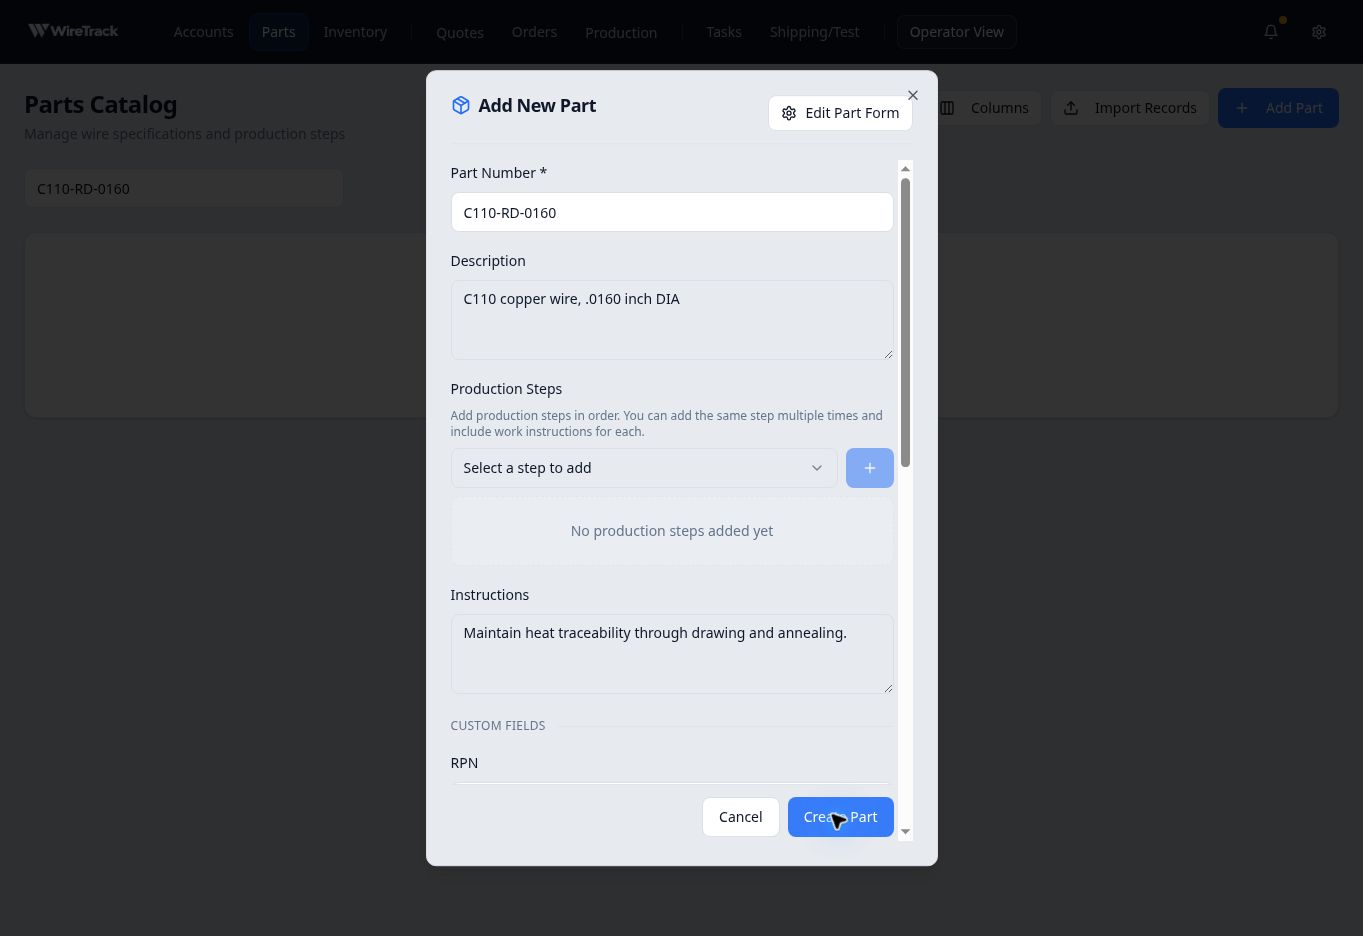
The part number identifies the record; the description explains the wire specification. - Complete the configured fields
Scroll within the form to Custom Fields. Complete the fields your company uses. This example includes RPN, RPDesc, Spool Instructions, Start Wire, and Inspection Instructions.
Use the appropriate fields for your own material and dimensional specifications. Writing a dimension in Description does not replace a separate required dimension field.
- Save and check the part
Select Create Part. On the saved part page, check the identifier, description, instructions and custom values. Reopen the record to confirm the values persisted.
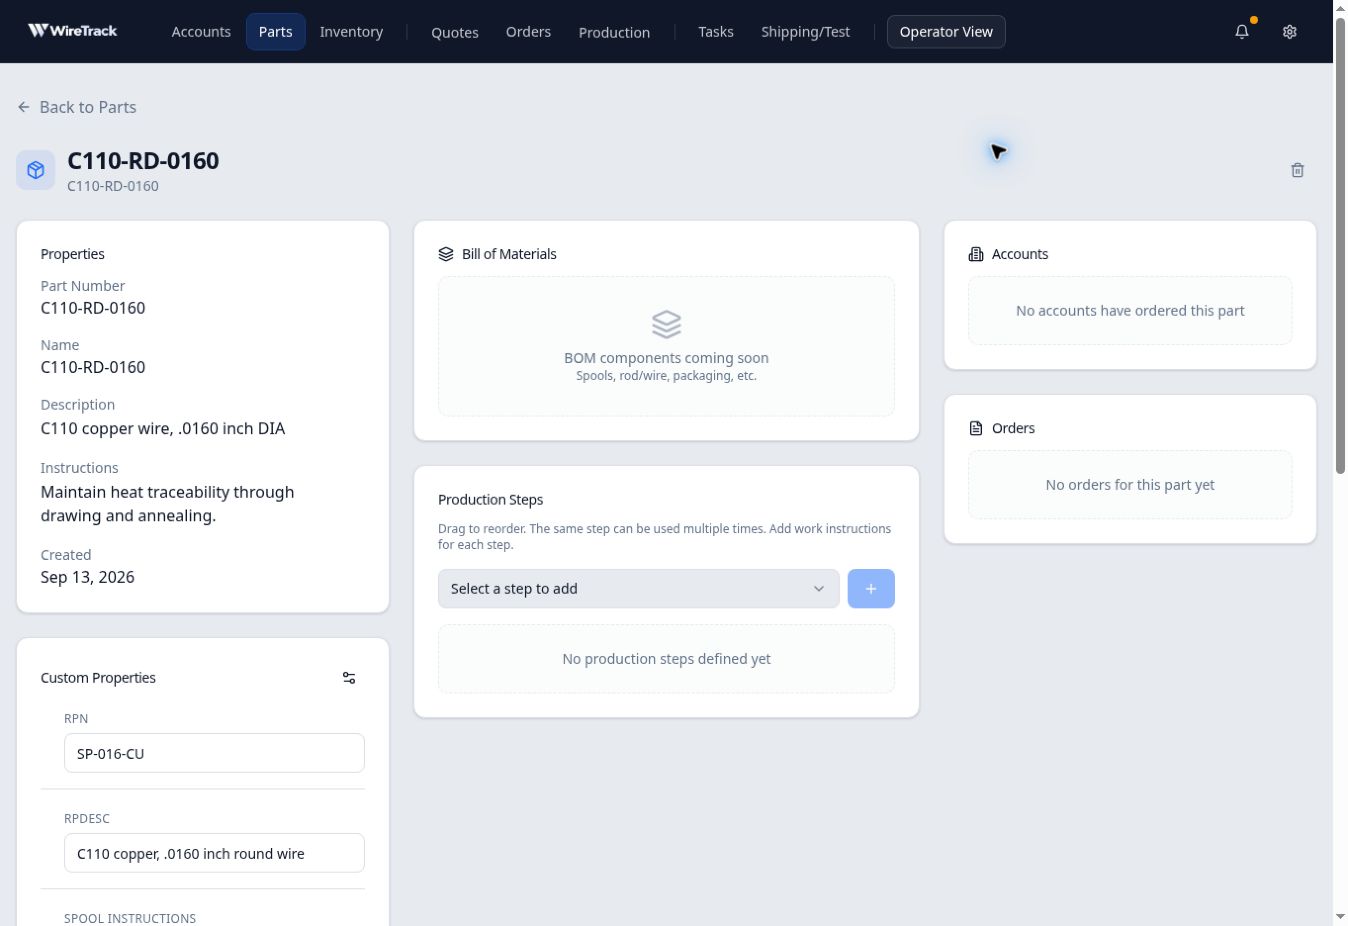
This example was saved before production steps were added.
Prepare the routing before creating an order
The example part was saved with no production steps. Its detail page showed No production steps defined yet. Add the intended routing and work instructions before creating an order from the part; follow Define a part’s production steps and instructions in Related reading.