
Define a part’s production steps and instructions
Set the sequence of production steps for a part, add instructions for each step, and check the saved routing before creating orders.
Before you start
You need access to Parts and permission to edit the part. Have your approved production sequence and work instructions ready. The stage names available in the selector depend on your company’s configuration.
Each occurrence of a stage is a separate step. For example, a routing can include Wire Drawing, then Annealing, then a second Wire Drawing step with different instructions.
Set up the routing
- Open or create the part
Select Parts in the navigation and open the part you want to configure. Find Production Steps.
For a new part, select Add Part, enter its Part Number and other details, and use the Production Steps section before selecting Create Part.
- Select a stage and add it
Choose a stage from Select a step to add, then click the + button beside the selector. Check that a numbered row appears. Selecting a stage alone does not add it to the routing.
Repeat for each step, including any repeated stages.
- Enter an instruction for each step
Use the instruction field beneath each numbered stage. When editing a saved part, click outside the field after entering the instruction, then reopen the part to confirm it persisted.
Give repeated stages distinct instructions so the person doing the work can tell the two passes apart.
- Check the order of the steps
On the saved part, use a row’s up or down arrow to move it in the sequence. Check that its instruction moves with it. Reopen the part and review the complete numbered sequence before creating an order.
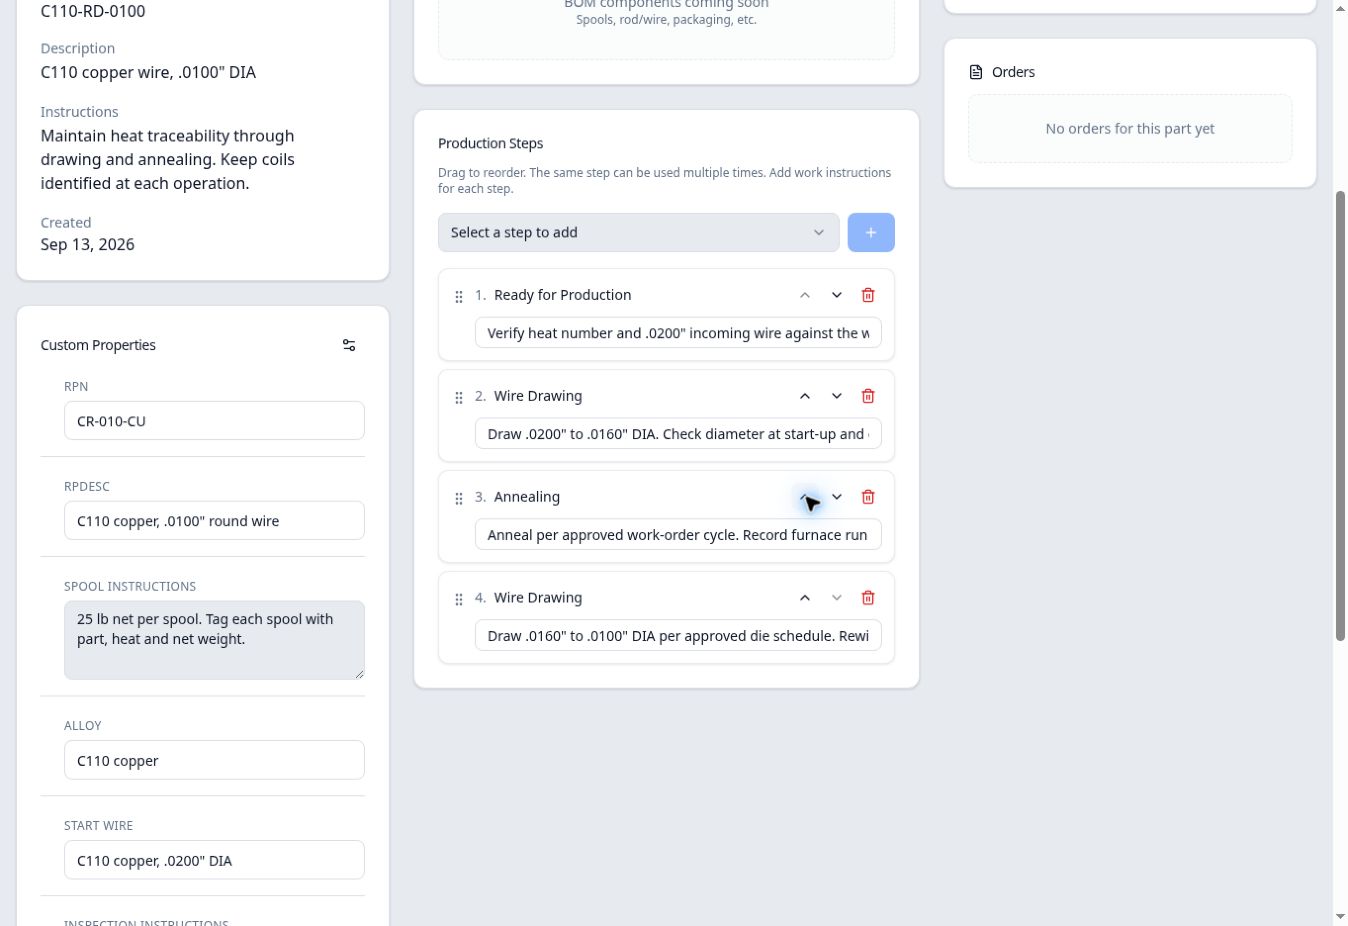
This fictional routing uses Wire Drawing twice. Each occurrence has its own instruction.
Expected result
Existing orders
Changing a part’s instructions does not automatically replace the instructions already captured on an existing order. Review the order’s Production Progress when checking instructions for work already booked.